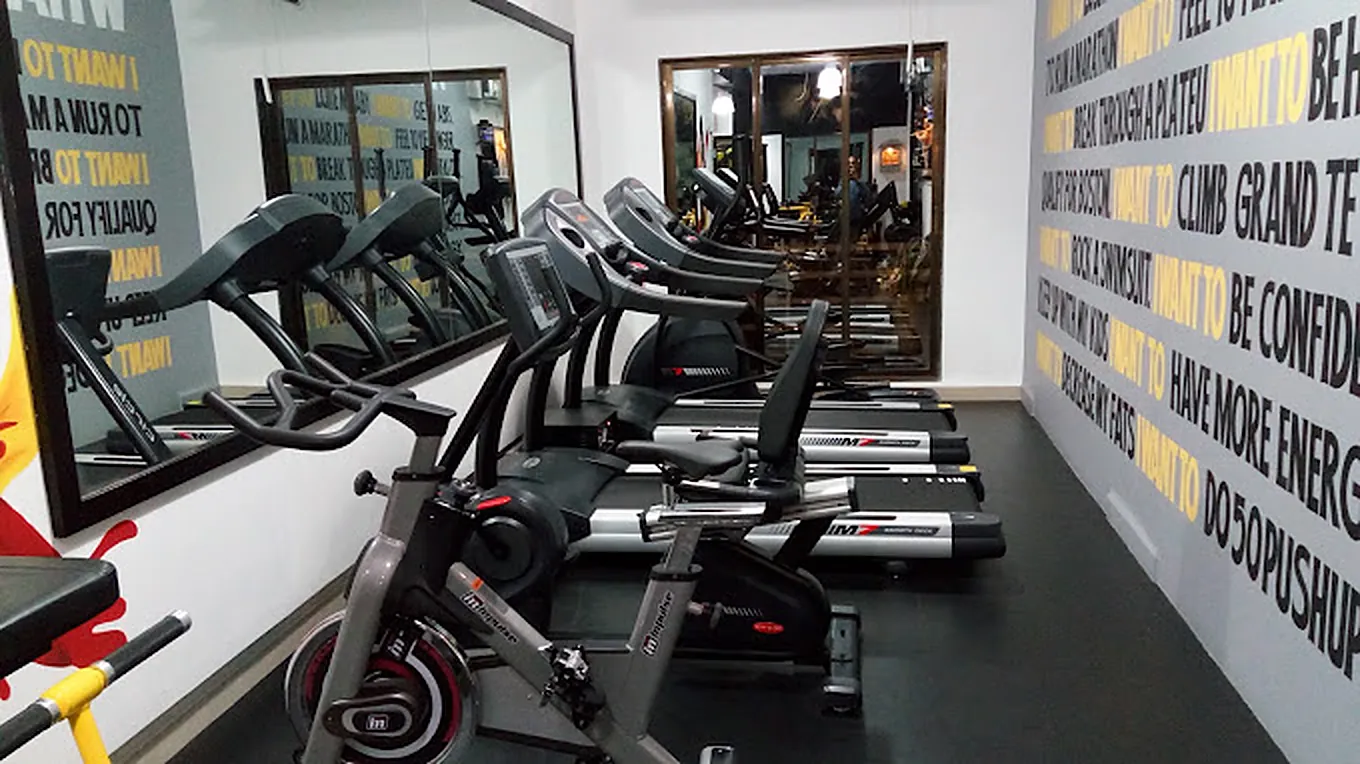
Training floor at SPARTANS unisex gym with treadmills, an elliptical and a spin bike

Before you start

What your core really does

Your core is the whole band of muscle between your ribs and your hips: the six-pack muscle in front, the obliques at your sides, a deep layer that wraps around you like a belt, and the muscles along your spine. Its main job is to hold your trunk steady while your arms and legs do the work. That is why the stations on this page train you to brace, to resist twisting and to control the lowering, instead of only curling up again and again.

8 stations, in order

The core circuit

Each card tells you what the exercise does for your body, the muscles it works, how to do it, what to avoid and a starting plan. Pick Men or Women to see the plan that usually fits.

How to run the circuit

  1. Go through the stations in order, one set at each, resting as your Men or Women plan says. Repeat the round as many times as the set count.
  2. New to core training? Stations 1, 2, 4, 6 and 8 are the beginner stations. Run those for a few weeks before adding the rest.
  3. Keep it to the end of your workout, two or three times a week. Your squats and deadlifts need a fresh core more than tired abs.
  4. On your first day, ask the trainer on the floor to check your plank line and the cable setup for stations 4 to 6.

Station 1 of 8

Dead Bug

  • Hold still
  • Beginner
  • Exercise mat
  • Stability demand 1 of 3 Supported

What it does for your body

The dead bug teaches the one skill every other station depends on: keeping your lower back still while your arms and legs move. Your deep core and the six-pack muscle work together to stop the lower back arching as a leg reaches out, which is the same control you need when you lift a suitcase onto a train rack or pick a child up off the floor. Because you lie on your back, the load on the spine stays low, so it suits beginners and people returning after a long break.

How to do it

  1. Lie on your back on a mat, knees bent over your hips at ninety degrees, arms pointing straight up.
  2. Breathe out fully and gently press your lower back into the mat. Keep that contact for the whole set.
  3. Slowly reach your right arm back past your head and straighten your left leg until the heel hovers above the floor.
  4. Pause for a second, return to the start, then repeat with the left arm and right leg.
  5. Shorten the reach if your lower back starts to lift. Range comes later, control comes first.

Common mistakes

  • Letting the lower back arch off the mat as the leg straightens.
  • Rushing the reps so momentum does the work.
  • Holding the breath instead of breathing out on each reach.

Starting plan for men

Sets
3
Reps
8 each side
Rest
45 s

Many men rush this one because it looks easy. Slow it right down, take three seconds to reach and keep the lower back pinned to the mat. Once that feels comfortable, hold a light dumbbell in each hand.

Starting plan for women

Sets
3
Reps
8–10 each side
Rest
30–45 s

A good first station, and a sensible one after childbirth once your doctor has given the go-ahead. Breathe out as you reach and feel the belly draw in. If your belly bulges along the midline, shorten the reach and tell the trainer.

Muscles worked

  • MainTransversus abdominis the deep belt-like layer under the abs
  • MainRectus abdominis the six-pack muscle down the front
  • AssistHip flexors the front of the hip (iliopsoas)

Tempo 3 s down, 1 s pause, 2 s up

Swap Easier: move only the legs, arms resting on the floor. Harder: hold a light dumbbell in each hand.

Station 2 of 8

Front Plank

  • Hold still
  • Beginner
  • Exercise mat
  • Stability demand 2 of 3 Braced

What it does for your body

The front plank trains your trunk to stay straight while gravity tries to sag your hips towards the floor. Your abs and deep core resist that sag, your obliques stop you tipping, and squeezing your glutes keeps the pelvis level. That stiffness carries over to almost everything: a solid plank is the same braced trunk you want under a barbell, when pushing a stalled scooter, or when holding good posture through a long day at a desk. It strengthens the middle, but it does not flatten the belly by itself.

How to do it

  1. Set your forearms on the mat with elbows under your shoulders and hands relaxed or loosely clasped.
  2. Step your feet back hip-width apart so your body forms one straight line from head to heels.
  3. Squeeze your glutes, tuck the tailbone slightly and pull your ribs down towards your hips.
  4. Keep breathing in short, steady breaths behind the brace. Look at the floor just ahead of your hands.
  5. End the set the moment your hips sag or your lower back starts to ache.

Common mistakes

  • Hips sagging towards the floor, which loads the lower back instead of the abs.
  • Hips piked high in the air to make the hold easier.
  • Chasing long times. A tight 30 seconds beats a sloppy two minutes.

Starting plan for men

Sets
3
Reps
20–40 s hold
Rest
45–60 s

Squeeze as if someone is about to poke your stomach. Most men try to hold for minutes with sagging hips, but shorter, harder holds build more strength. Once 40 seconds is solid, ask the trainer to add a plate on your upper back.

Starting plan for women

Sets
3
Reps
20–30 s hold
Rest
30–45 s

Start on your knees if the full version shakes early, and build towards your toes over a few weeks. Keep the ribs down and the glutes tight instead of holding your breath. The straight line matters more than the clock.

Muscles worked

  • MainTransversus abdominis the deep belt-like layer under the abs
  • MainRectus abdominis the six-pack muscle down the front
  • AssistObliques the sides of your waist, internal and external
  • AssistGlutes your buttocks and the side of the hip

Swap Easier: plank on your knees or with hands on a bench. Harder: lift one foot for a few seconds.

Station 3 of 8

Side Plank

  • Hold still
  • Intermediate
  • Exercise mat
  • Stability demand 3 of 3 Unsteady

What it does for your body

The side plank works the side of your trunk, which does a quiet but important job: stopping you bending sideways when one hand is loaded. Your obliques and the quadratus lumborum, a deep muscle beside the lower spine, hold you up, while the glute on the bottom side keeps the hip lifted. This is the strength you use when you carry a heavy bucket or a bag in one hand. It is a common choice in back-care programmes because it trains the trunk with fairly low load on the spine.

How to do it

  1. Lie on your side with your elbow directly under your shoulder and your legs stacked, or bottom knee bent.
  2. Brace your trunk and lift your hips until your body forms a straight line from head to feet.
  3. Push the floor away with your forearm so your shoulder does not sink towards your ear.
  4. Hold while breathing steadily, then lower with control and switch sides.

Common mistakes

  • Hips drifting backwards so the body folds at the waist.
  • Letting the bottom shoulder collapse instead of pushing the floor away.
  • Rolling the chest towards the floor to make the hold easier.

Starting plan for men

Sets
2–3 each side
Reps
20–30 s hold
Rest
45 s

Men often find this harder than the front plank because the sides of the trunk get little direct work in a usual gym routine. Keep the top hip stacked over the bottom one, and give the weaker side an extra set.

Starting plan for women

Sets
2–3 each side
Reps
15–30 s hold
Rest
30–45 s

Start with the bottom knee bent on the mat, which shortens the lever and lets you hold a clean line. Move to straight legs when you can hold 30 seconds on each side without the hips dropping or the shoulder aching.

Muscles worked

  • MainObliques the sides of your waist, internal and external
  • AssistTransversus abdominis the deep belt-like layer under the abs
  • AssistGlutes your buttocks and the side of the hip
  • AssistErector spinae and quadratus lumborum the muscles along and beside your spine

Swap Easier: bottom knee on the mat. Harder: lift the top leg, or rest a light dumbbell on your hip.

Station 4 of 8

Pallof Press

  • Hold still
  • Beginner
  • Cable/pulley station with a single handle
  • Stability demand 3 of 3 Unsteady

What it does for your body

The Pallof press is an anti-rotation exercise: the cable tries to twist you towards the machine and your core refuses. Your obliques and deep core do most of the work, with the glutes holding your hips square. This is the control that protects your lower back when a load pulls you off centre, like a heavy shopping bag on one side or a door that swings open in the wind. It looks gentle, yet done slowly with a fair weight it is one of the most useful trunk exercises on the floor.

How to do it

  1. Set a cable handle at chest height. Stand side-on to the machine, a long step away from it.
  2. Hold the handle with both hands at the middle of your chest, feet hip-width apart, knees soft.
  3. Brace and press the handle straight out in front of you until your arms are fully straight.
  4. Hold for two seconds without letting your chest or hips turn towards the machine.
  5. Bring the handle back to your chest with control. Finish the set, then turn around for the other side.

Common mistakes

  • Standing too close, so the cable has no pull to resist.
  • Letting the hips or chest rotate as the arms straighten.
  • Shrugging and pushing with the arms instead of bracing the trunk.

Starting plan for men

Sets
3 each side
Reps
10
Rest
45–60 s

The usual mistake is pinning the stack so heavy that you twist and fight it. Pick a weight you can hold perfectly square through the two-second pause, then go up a plate when the last rep still feels steady.

Starting plan for women

Sets
3 each side
Reps
10–12
Rest
30–45 s

Standing core work like this carries straight over to daily life, so do not stick to floor exercises only. Move the pin down a plate once the pause feels easy. Steady control is the goal, not a light weight.

Muscles worked

  • MainObliques the sides of your waist, internal and external
  • MainTransversus abdominis the deep belt-like layer under the abs
  • AssistRectus abdominis the six-pack muscle down the front
  • AssistGlutes your buttocks and the side of the hip

Tempo 2 s down, 2 s pause, 2 s up

Swap Easier: half-kneeling with a lighter weight. Harder: step further from the machine or hold each press longer.

Station 5 of 8

Cable Wood Chop

  • Rotate
  • Intermediate
  • Cable/pulley station with a single handle
  • Stability demand 2 of 3 Braced

What it does for your body

The wood chop trains rotation, the twisting power you use when you swing a bat, throw a ball or hand a heavy box to someone beside you. Your obliques drive the turn while the deep core and glutes link the hips to the shoulders, so the force travels through the whole body instead of through the lower back alone. Done with control it builds a strong, coordinated waist and teaches you to turn from the hips. It is a skill exercise first, so keep the weight moderate.

How to do it

  1. Set the pulley at the top, attach a single handle and stand side-on with feet wider than your hips.
  2. Grip the handle with both hands above the shoulder nearest the machine, arms nearly straight.
  3. Pull the handle diagonally down across your body towards the opposite knee, turning hips and chest together.
  4. Let your back foot pivot as you turn so the knee and hip move as one unit.
  5. Return slowly along the same diagonal. Complete all reps, then switch sides.

Common mistakes

  • Twisting only through the lower back while the hips stay locked.
  • Bending the arms and turning it into a pulldown.
  • Letting the weight stack slam on the way back up.

Starting plan for men

Sets
3 each side
Reps
10–12
Rest
60 s

Resist the urge to heave a heavy stack. Rotation under fatigue is where backs get cranky, so pick a weight you can move smoothly, and stop the set when your hips stop turning with your chest.

Starting plan for women

Sets
3 each side
Reps
12
Rest
45 s

Think of a slow, strong swing, not a quick flick. Turn the hips and let the back foot pivot. If the high start bothers your shoulders, set the pulley at chest height and chop straight across instead.

Muscles worked

  • MainObliques the sides of your waist, internal and external
  • AssistRectus abdominis the six-pack muscle down the front
  • AssistTransversus abdominis the deep belt-like layer under the abs
  • AssistGlutes your buttocks and the side of the hip

Tempo 1 s down, 1 s pause, 3 s up

Swap Easier: chop straight across with the pulley at chest height. Harder: low-to-high chop from a split stance.

Station 6 of 8

Cable Crunch

  • Curl
  • Beginner
  • Cable/pulley station with a rope
  • Stability demand 1 of 3 Supported

What it does for your body

The cable crunch is the one station that trains the six-pack muscle through its main job, curling the ribcage towards the pelvis, against a load you can measure and increase. That makes it a solid way to build thicker, stronger abs, the same way you build any other muscle: steadily heavier weight and good reps. Stronger abs help you sit up from lying down, brace better under heavy lifts and stand more upright. Remember that bigger ab muscles stay hidden until your overall body fat comes down.

How to do it

  1. Attach a rope to the high pulley and kneel facing the machine, about an arm's length away.
  2. Hold the rope ends beside your forehead and keep your hips high, roughly over your knees.
  3. Breathe out and curl your ribs down towards your hips, rounding the upper back like rolling up a mat.
  4. Pause when your elbows reach your mid-thighs, then uncurl slowly against the cable.

Common mistakes

  • Sitting back on the heels so the hips do the movement instead of the abs.
  • Pulling with the arms instead of curling the trunk.
  • Using a stack so heavy that the reps turn into short jerks.

Starting plan for men

Sets
3
Reps
10–15
Rest
60 s

This is where ego loading shows up. If your hips drop back to your heels, the stack is too heavy. Use a weight that lets you feel a hard squeeze at the bottom and control a slow three-second return.

Starting plan for women

Sets
3
Reps
12–15
Rest
45 s

Training your abs with weight will not give you a blocky waist. Muscle grows slowly, and your shape depends far more on overall body fat. Choose a weight that leaves two good reps in the tank and own the slow return.

Muscles worked

  • MainRectus abdominis the six-pack muscle down the front
  • AssistObliques the sides of your waist, internal and external

Tempo 2 s down, 1 s pause, 3 s up

Swap Easier: crunch on a mat with feet flat. Harder: curl slightly towards each knee in turn for the obliques.

Station 7 of 8

Hanging Knee Raise

  • Curl
  • Intermediate
  • Pull-up bar
  • Stability demand 3 of 3 Unsteady

What it does for your body

Hanging from a bar and lifting your knees trains your abs to curl the pelvis up towards the ribs, together with the hip flexors that lift the legs. Your grip and shoulders get plenty of work from simply hanging, and your trunk learns to stay still without swinging. The carry-over is real: strong hip flexors and abs help you climb high steps, board a bus quickly and lift your legs without straining your back. Expect your grip to tire before your abs at first.

How to do it

  1. Hang from the pull-up bar with hands shoulder-width apart, arms straight and shoulders gently pulled down.
  2. Brace your trunk so your body stays still, with your legs hanging straight below you.
  3. Lift your knees towards your chest and curl your pelvis up at the top, as if tipping a bowl back.
  4. Lower your legs slowly over about three seconds without letting your body swing.
  5. Step down from the bar the moment your grip starts to slip.

Common mistakes

  • Swinging the legs up with momentum and kicking at the bottom.
  • Lifting the knees only to hip height without curling the pelvis.
  • Hanging loosely with the shoulders shrugged up by the ears.

Starting plan for men

Sets
3
Reps
8–12
Rest
60–90 s

Stop the swing before you add reps. If you start rocking, pause at the bottom for a second between reps. When 12 clean reps feel easy, slow the lowering further or straighten your legs a little.

Starting plan for women

Sets
3
Reps
6–10
Rest
60 s

If your grip gives out early, that is common and it improves quickly. Start with fewer reps and rest well between sets, or use the easier swap below. A tight curl at the top counts for more than how high the knees travel.

Muscles worked

  • MainRectus abdominis the six-pack muscle down the front
  • MainHip flexors the front of the hip (iliopsoas)
  • AssistObliques the sides of your waist, internal and external
  • AssistForearm flexors the inside of your forearm, your grip

Tempo 3 s down, 1 s pause, 1 s up

Swap Easier: lying knee raise on a mat or bench. Harder: hanging straight-leg raise, an advanced progression.

Station 8 of 8

Farmer's Carry

  • Hold still
  • Beginner
  • A pair of heavy dumbbells
  • Stability demand 2 of 3 Braced

What it does for your body

The farmer's carry is exactly what it sounds like: pick up two heavy dumbbells and walk. Your grip, deep core and obliques work hard to keep the trunk upright and the spine still with every step, while the upper back and glutes hold your posture. It is about as close to daily life as gym training gets, like carrying shopping bags up the stairs or water cans from the car. It also finishes the circuit with honest whole-body effort that gets your breathing up.

How to do it

  1. Stand between two dumbbells, hinge at the hips with a flat back and pick them up like a deadlift.
  2. Stand tall, shoulders down and back, ribs stacked over the hips, arms long by your sides.
  3. Walk with short, steady steps, looking ahead, without letting the dumbbells swing or your body lean.
  4. Turn carefully at the end of your space and walk back.
  5. Set the dumbbells down the same way you picked them up, hinging at the hips.

Common mistakes

  • Leaning back or to one side to balance the load.
  • Rounding the back when picking up or setting down the dumbbells.
  • Taking long, rushed strides that make the dumbbells swing.

Starting plan for men

Sets
3
Reps
30–40 s walk
Rest
60–90 s

Go heavier than you think, but only as heavy as you can carry while standing perfectly tall. If your shoulders round forward or your grip opens before the time is up, drop down a size.

Starting plan for women

Sets
3
Reps
30–40 s walk
Rest
60 s

Many women pick dumbbells that are far too light here, and your grip and trunk can usually handle more than you expect. Choose a pair that makes the last few steps genuinely hard while you still walk tall and steady.

Muscles worked

  • MainForearm flexors the inside of your forearm, your grip
  • MainObliques the sides of your waist, internal and external
  • MainTransversus abdominis the deep belt-like layer under the abs
  • AssistErector spinae and quadratus lumborum the muscles along and beside your spine
  • AssistGlutes your buttocks and the side of the hip

Swap Easier: lighter dumbbells for a shorter walk. Harder: suitcase carry, one dumbbell in one hand only.

Station map

Difficulty against stability demand

Every station placed by how hard it is to learn and how much steadiness it asks of your trunk. Bigger bubbles work more muscle groups. Hover or tab to a bubble for details; click, tap or press Enter to jump to its card.

Core stations by difficulty level and stability demand
Core exercises by difficulty and stability demandQuadrant bubble chart of the 8 stations. Across: difficulty level. Up: stability demand from 1 (supported) to 3 (unsteady). Bubble size: number of muscle groups worked. Colour: movement pattern. Dead Bug: beginner, stability 1, 3 muscle groups, hold still. Front Plank: beginner, stability 2, 4 muscle groups, hold still. Side Plank: intermediate, stability 3, 4 muscle groups, hold still. Pallof Press: beginner, stability 3, 4 muscle groups, hold still. Cable Wood Chop: intermediate, stability 2, 4 muscle groups, rotate. Cable Crunch: beginner, stability 1, 2 muscle groups, curl. Hanging Knee Raise: intermediate, stability 3, 4 muscle groups, curl. Farmer's Carry: beginner, stability 2, 5 muscle groups, hold still.Start hereSimple, but hard to keep stillMove with controlBuild up to these1 Supported2 Braced3 UnsteadyStability demandBeginnerIntermediateDifficulty level1Dead Bug6Cable Crunch2Front Plank8Farmer's Carry3Side Plank7Hanging Knee Raise4Pallof Press5Cable Wood Chop Core exercises by difficulty and stability demandQuadrant bubble chart of the 8 stations. Across: difficulty level. Up: stability demand from 1 (supported) to 3 (unsteady). Bubble size: number of muscle groups worked. Colour: movement pattern. Dead Bug: beginner, stability 1, 3 muscle groups, hold still. Front Plank: beginner, stability 2, 4 muscle groups, hold still. Side Plank: intermediate, stability 3, 4 muscle groups, hold still. Pallof Press: beginner, stability 3, 4 muscle groups, hold still. Cable Wood Chop: intermediate, stability 2, 4 muscle groups, rotate. Cable Crunch: beginner, stability 1, 2 muscle groups, curl. Hanging Knee Raise: intermediate, stability 3, 4 muscle groups, curl. Farmer's Carry: beginner, stability 2, 5 muscle groups, hold still.Start hereSimple, but hardto keep stillMove with controlBuild up to these123Stability demandBeginnerIntermediateDifficulty level1Dead Bug6CableCrunch2FrontPlank8Farmer'sCarry3SidePlank7HangingKneeRaise4PallofPress5CableWood Chop
  • Hold still the trunk resists arching, bending or twisting
  • Curl the abs curl the ribs and pelvis towards each other
  • Rotate the trunk turns under control, driven from the hips

Bubble size: muscle groups worked

  • 2 groups
  • 5 groups
Core stations by difficulty, stability demand and muscle groups worked
StationExerciseLevelStability demand (1 to 3)Muscle groups workedPatternQuadrant
1Dead BugBeginner13Hold stillStart here
2Front PlankBeginner24Hold stillStart here
3Side PlankIntermediate34Hold stillBuild up to these
4Pallof PressBeginner34Hold stillSimple, but hard to keep still
5Cable Wood ChopIntermediate24RotateMove with control
6Cable CrunchBeginner12CurlStart here
7Hanging Knee RaiseIntermediate34CurlBuild up to these
8Farmer's CarryBeginner25Hold stillStart here

What the stability levels mean

1 Supported
you lie or kneel, so the floor holds you steady
2 Braced
you hold a long body line or walk with a load
3 Unsteady
a narrow base, hanging, or a load pulling you sideways

Know the parts

The muscles of your core

Good to know

Core & Abs questions

Will these exercises reduce my belly fat?

Not directly. Spot reduction does not happen, so no plank or crunch burns fat from the stomach alone. Your abs start to show when your overall body fat comes down, and that comes from steady eating habits, enough protein, daily movement and regular strength training. The circuit builds the muscle underneath, so your middle looks firmer when the fat does come off.

How often should I train my core?

Two or three times a week is enough for most people. Run this circuit at the end of a weights session, or pick four stations on alternate days. Your core also works hard during squats, deadlifts and overhead presses, so heavy compound lifts done with a good brace count as core training too.

Do women need different core exercises from men?

No. The movements are the same for everyone. The Men and Women views only change the starting sets, reps and rest, and the coaching notes we see most often on the floor. After pregnancy, get your doctor's go-ahead first and tell the trainer, so the early stations can be adjusted to how your body is recovering.

Can I train abs if I have a back problem?

It depends on the problem, so ask your doctor or physiotherapist first. Holds that keep the spine still, such as the dead bug, side plank on the knees and Pallof press, are often where back-care programmes begin. Stop any exercise that brings on sharp or radiating pain, and speak to the trainer about alternatives.

Why does my grip give out before my abs?

On the hanging knee raise and the farmer's carry your hands hold the whole load, and grip strength usually lags behind the trunk at first. That is normal and it catches up within a few weeks of regular training. Until then, rest a little longer between sets and build grip with the carry instead of skipping the hanging work.

Call Directions Timings